The hardwood floor project was a surprise post Thanksgiving project. My wife had been whispering in my ear sweet dreams of hardwood flooring in our dining room and kitchen for a while, as early back as when we first bought the house. I too was not happy with the old dirty looking linoleum kitchen floor that no matter how hard you scrubbed, it never seemed clean. Also the nice carpet in the dining room that somehow always seemed to get wet, stained, covered in crusty rice and in need of constant vacuuming. But a hardwood floor? Not really in the cards. Hardwood would cost a fortune just for materials, I had no idea how to install it, and a professional installer would probably cost more for the install than the materials.
 |
| Sadly this is the only picture I have of the actual product in its original package. |
 |
| A screen shot of what the flooring looks like from ConsumerReports.org |
Then one day in November it seemed that fate was calling me, for there, in the middle of the floor in the markdown section of Lowe's stood a pallet holding 10 packaged boxes of solid oak 3/4 inch nail-down tongue and groove "gunstock" finish hardwood flooring for 50% off last marked price. The brand was NobleHouse. Apparently Lowe's no longer sees fit to carry this brand so they liquidated it directly into the trunk of my Pacifica. Each box would cover 20.9 square feet. I sat down on the pallet of wood in order to signal to all the circling bargain hunters that this was my hardwood! I got my wife on the phone and had her do an emergency floor measuring session while I waited, only occasionally having to pound my chest to defend my territory.
After an excruciatingly long time, the measurements came in. 190 square feet of coverage needed. A quick calculation told me that I was sitting on 209 square feet of Oak. SCORE! I flagged down an unsuspecting Lowe's guy and requested a pallet jack. They flagged down someone else, who flagged down a third someone else, because apparently everyone there was working someone else's department, and it was decided that instead of a pallet jack, they'd simply help me load it onto an elevated flat cart, apparently because no one knew where a pallet jack was.
The trip from the discount rack in the back to the registers in the front was a whole adventure all by itself. I had Eric with me, who was on foot, and three helpful Lowe's employees in tow, all supervising as I pushed the 3800 lb cart with a broken left wheel, jiggle, jiggle, jiggle, and a right wheel that had an ancient piece of bubble gum stuck to it, causing the cart to hiccup and stall every time the wheel turned, jiggle, jiggle, ka-thump, jiggle, jiggle, ka-thump, jiggle, jiggle, ka-thump...
As the juggernaut begins it's slow role down the aisle, it's clear that the Thanksgiving specials consisting of giant cardboard displays filled 240 piece drill bit/socket wrench/soda can openers are going to be a problem. The people who thought to put those in the middle of the aisle know that they have 42" wide carts right? I dodge past the drill bit display, weave between the 8 pack of pliers and the combination floor scraper/flash light display, and plow straight into the Kobalt Multi-Cutter Utility Knife display. Eric at this point has decided that he needs to jump in and help push, possibly because even a 22 month old baby can see that three supervising Lowe's employees is not enough to get this thing to the front of the store. To their credit, the employees did graciously volunteer to clean up the wide swath of destruction I left in my wake as I negotiated finally made it through the obstacle course.
When we reached the other side, Eric bounded off toward the exit without me, and I still had to turn the corner and head up toward the cash registers. One of the employees started to push the cart for me as I scrambled after Eric. When I caught the squirming toddler, I turned back to see that my cart of flooring was sitting around the corner, about 10 feet from where I had left it, and the helpful employee who apparently had lost interest in my cart was wandering aimlessly away looking for customers to help. I plopped Eric down on top of the flooring and pushed him the rest of the way to checkout. Total cost, $340. Thankfully, (and redeeming Lowe's employees everywhere) the front manager and his sidekick both helped me to my car AND unloaded the flooring for me. Thank you front manager and your sidekick!!!
I brought my hard-won prize home and unloaded it into the upstairs living room behind the couch where it would be safe from the damp and cold of the garage and still be out of the way. One six foot package at a time, each weighing in at ~300 lbs. My motorcycle weighed less than these things. At least they where bulky and unwieldy, so that was a blessing. There the flooring stayed for the next three weeks while I recovered.

 After Thanksgiving I was ready to tackle the project again. I unloaded each package and stacked all the wood neatly according to length right on top of the area where it was to be installed. Moments later I realized the problem with this and had to move all the neat little stacks to the living room.
Next began the most difficult, tedious, irritating and annoying part of the job. Removing the linoleum and flooring in the kitchen down to the sub-floor. I figured I could do it in 3 or 4 hours. Not so! First, I figured out that the top floor goes under all the cabinets as well, cabinets don't sit directly on the sub-floor after all. Next I discovered that it's not a plywood overlay after all, but rather, 1/2" of particle board with 1/4" of plywood on top of that. To make matters worse, the installer saw fit to nail down the 1/2" of particle board with ring shank nails at approximately 1 every 4 inches and then nail down the 1/4" plywood with some sort of nail gun nail that is twisted in order to provide maximum holding power, 1 every 4 inches. The result was this floor was held to the sub-floor by about 50 nails per square foot. Too late to give up now, I proceed.
 |
| I made it this far in 4 hours. I then gave up and went to bed. |
The next morning I had worked out in my mind what I was going to do to get the flooring up. I headed off to Home Depot to rent one tool and buy another. First on my list: Toe kick saw. I'd seen one of these babies before somewhere so I had a good idea of what I was looking for, I just didn't know what it was called.


The Toe kick saw looks like a circular saw but with a long neck to reach underneath annoying things like cabinets! I rented the tool for four hours for $25 including tax and insurance and all that, and used it for about 10 minutes. I buzzed my way around all the cabinets in the kitchen and thankfully even remembered to pull out the stove and refrigerator and buzzed the floor up there too. I cleaned up the tool, handed it to my wife and she most graciously returned.
The other tool I bought turned out to be one of the most handy tools for the project, not only for removing nails from the flooring, but also later as a pry bar to make the new floor nice and tight on the end pieces.
 |
| The Dead On Tools 10-5/8 Inch Exhumer Classic Style Nail Puller. |
With this tool, I pulled out approximately 9,500 nails from the the floor. It was the most valuable player in the tool world for the flooring project, and that's saying something, for there where so many valuable tools that I'd never even used before that I needed for this project.
After two more days of floor removal, I finally had the kitchen down to the sub-floor and also rolled back the carpet and pad in the dining room and cut it back to where I estimated the wood would start. I left myself about 6 inches of overlap because the last thing I wanted to do was mess up the carpet transition.
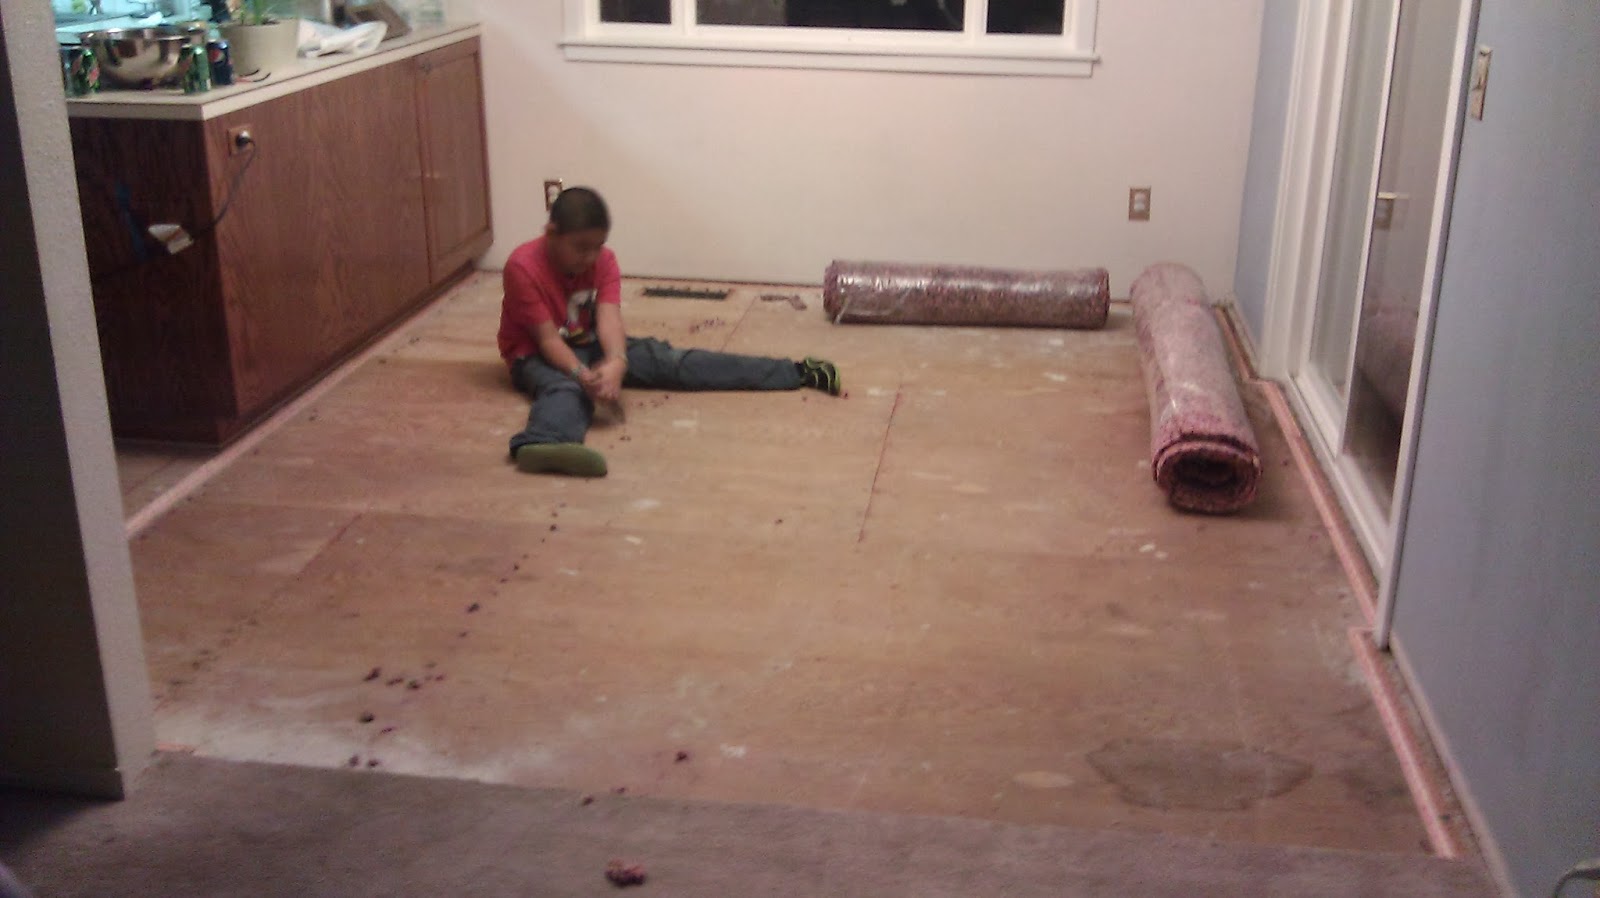
I enlisted the aid of Liam to pull out the last 200 staples, carpet tacks and tack strips in the sub-floor where the carpet pad had been. He did a great job, and can verify that 200 staples was not an exaggeration.
We worked together to pound down the nail heads that where sticking up a little bit more than they should, and also nailed in a lot of extra nails to help work out as much of the squeaks and creaks in the floor that we could. This is more difficult than you might think, given that the addition of 5 nails directly on a squeak doesn't necessarily get rid of the squeak... figure that.

Next it was back to the store, for I decided that installing the hardwood directly to the sub-floor was going to be one of those bad ideas that only the Amos School of Construction would think of. So instead I went with a quasi-bad idea and installed 1/4 plywood overlay right on top of the sub-floor and put the hardwood on that. It looks really good at this point, even though I know there's a lot of flooring experts out there that would likely cringe.
 I decided to include a little dog-leg in the flooring to account for an area that I thought might look awkward in the flooring transition. I removed the carpet from this area as well and left some overlap in hopes that I'd be able to make a good carpet to hardwood transition later. I put down some of the hardwood and hand nailed it into place per instructions I found online. I tried to get a single piece to use as the edge board, but my longest board was two inches too short, so I had my wife pick out a pair of nicely matched short boards to use as edging and also pick out the best looking pieces for the edging all the way across to the other side and nailed that down too with extra nails on both sides to make sure they were in their really straight and tight. The whole floor was aligned off these boards so I took extra time to make sure they were aligned as parallel as possible to the opposite wall.
At this point I made a bad judgement call and continued to hand nail in the boards. It was slow work lining up the individual sticks and pounding in the nails and then using a nail set to tap them in flush on the tongue of each board. This was bad judgement for several reasons. One, I pounded in the nails too far on several of the boards and caused some minor but visible dents in some of the edges where the hammer lightly touched the board edge. Two, I used 2 inch finishing nails. They are only going through about an inch of wood into empty space, so I really needed ring shank at least, so I am certain that over time the boards are going to start to feel loose as the nails lose their grip on the wood. Three, it was such slow, tedious work that it seemed I wasn't making much progress. I was losing my joy in the project to lack of perceived progress. I made it through an entire box of finish nails before the day was over and I was done. That night I resolved to get a floor nailer and do the rest of the floor right.
 |
| It took about 6 hours to do this much by hand. Looks good but I suspect there will be problems in the future. Time to get a floor nailer! |
 |
| Even Mommy gets in on the action! |
 |
| Eric helps out whenever he can! |
The next morning when I got to Home Depot to rent a floor nailer, there where four other people in line already, and the poor fellow behind the counter was obviously short handed, mostly obvious because he kept saying how short handed he was. One guy wanted a repair, but the repair guy quit the Friday before. Another guy wanted to pay cash for his deposit, but apparently Home Depot only takes credit for deposit, probably so they can hit your card for the full price of the tool if you break it. Another guy wanted to rent something that he didn't have because the five in stock where broken and the repair guy quit the Friday before. Some other guy tried to haggle with him over a tool rental, trying to get him to rent a tool to him for $5 bucks because he'd only need it for an hour. No luck on the haggling, but nice try!
When it was finally my turn, I told him I needed a pneumatic flooring nailer. This was not accurate, since he took me over to the nailers with a cart and started to load up this big air compressor and a hose. I stopped him and asked if I had to pay extra for the compressor. $30 for four hours, and $30 for four hours on the flooring nailer. No, I said, what about that manual one on the wall there. Yep, that's only $25 for four hours or $40 for 24 hours, but I'd have to hit it really hard so people don't usually like those. I'll take it! Oh, by the way, the Home Depot is out of flooring nails. I'll take it anyway! Lowe's is just down the road, and I know I saw flooring nails there the other day. Thankfully they actually do have some in stock... one whole box, $20... and I make it back home after only an hour of lines and running around.


Meet the Powernail 16 Gauge Manual Hardwood Floor Ratcheting Cleat Nailer! This handy dandy contraption was designed to let you pound in flooring nails at just the right angle and depth so that the you don't have to waste all the time lining up a nail, then tapping it in, and you don't risk damage to your material. This was the second most valuable player in my tool set for this project and cost about $40 / 24 hrs.
When I got this home and set it up, it was clear that I now had the right tool for the job. My wife and I where able to slap down four additional rows of hardwood in record time. It went so quick that I initially had hope that I'd finish with the nailer and be able to return it in the cheaper 4 hour window. This proved to be optimistic. I ran into a setback when it was time to move the refrigerator back up into it's hutch. A year earlier when we bought this large refrigerator, I had to cut away the wooden hutch in order to allow it to fit, not just for width, but for height as well. I removed the upper cabinet, sawed it in half and removed about three inches from it and then glued it all back together. This allowed my new fridge to fit in the space and still have cabinets above it. There wasn't much clearance to begin with. When I installed the new floor, I removed 3/4" of material and put down 1/4" underlay and 3/4" of hardwood, effectively raising the floor 1/4". Suddenly I wasn't so sure the fridge was going to fit back in the hutch.
 Gennie and I worked out a way to get the back half of the fridge up onto the hardwood and sure enough, it didn't fit. It was ever so slightly too tall. I sat back and stared at it for a while, mentally cursing the Amos School of Construction for always being 1/4" off. Then I saw a possible solution. The refrigerator was only half way on the hardwood. The front was still an inch lower being on unfinished floor. Because of that, there may be a chance that when I raise the front, the back will lower enough to get under the hutch. I heaved up the front of the 1,000 behemoth and jammed my foot under the front so that it wouldn't drop back down. Then I wiggled my foot back and forth and I tried to jockey the fridge forward. Sure enough, there was just enough clearance now that it started to go under the hutch. Once I had the fridge all the way onto the hardwood I started to press it into place, careful not to crush the water hose or power cable. At last, when it was in place, I saw the damage. When lifting it up and jockeying it into place, the rear feet of the fridge must have dug into the floor, because there was definitely some groove damage. Ah well, it's a small price to pay for the absolute luck that I didn't have to take that hutch down and shorten it again!
I swear there's less than 1/16" clearance between the fridge and the hutch now! WHEW! Even now I marvel that the darn thing fit. The cabinet doors open too, although one of the handles does bump if you are pulling down too hard. I'll have to fix that sometime later.
I finished up the kitchen portion including under the stove up to the dishwasher until I couldn't put the nail gun into position anymore. Then I switched over to the dining room and finished that side until I couldn't line up the gun again. Near the sliding glass doors I put two header boards to give it a transitional look.
The hard part for the wall pieces was ripping some boards lengthwise so that it fit against the wall while still leaving some clearance for expansion. This was especially true under the dishwasher where I did not pull the dishwasher out, but rather cut the sub-floor up as far as I could get. That left me with a small area where I had to cut a piece of flooring in a rather odd manner and get it to fit into the shape left by the opening. It turned out very good, except that I couldn't nail it into place. I turned to wood glue and glued it to the board next to it and now I simply hope that the glue holds forever in an area destined to get water under it. Fingers crossed!

Over by the air vent was a similar situation. I cut the wood strips to fit on both sides, then made L shaped cuts into the other pieces and a tiny 1"x12" piece that fit in a small section that needed covering. This part I'm proud of because the vent fits in perfectly.

 |
| Dimples! Dimples are only cute on babies! |

Then I decided to do it with tack strip instead. I went to Harbor Freight Tools and bought the cheapest carpet puller and stair tool I could find. I pulled up the carpet again, cut away the extra overlap, replaced the carpet pad, and nailed down tack strip to hold down the carpet. Then I pulled the carpet up over the tack strip and used the stair tool to tuck in the ends into the groove. This ended up looking a lot better than before, simply because now there are no dimples in the carpet.
 |
| No more dimples! |
 Overall the project turned out really nice. Surprisingly nice actually. I still have to put down the base boards and trim, and now Gennie wants to paint the cabinets because we have an awful lot of wood in our kitchen/dining room and she really wants to break it up a bit. The boys like the hardwood too because it's fun to slip and slide on it. I am particularly happy with the fact that it's now all one surface between the kitchen and the dining room, giving the area a nicer feel to it.
 |
| Left alone on the new floor the two boys wonder what to do. |
 |
| Naturally they hitch a ride out of here! |
During the project I found 5 or 6 pieces of wood that I would consider to be sub-standard, such as cracks, bad grain, and a couple even looked burned a little. Also, there where another 5 or 6 boards that I ruined, either by nailing wrong, or by installing backward, or whatever. On the plus side though, there where many boards that I had to custom cut to fit with the table saw, and I was able to use almost all of the cull and damaged boards in one way or another. I had almost no waste. I had about 16 square feet of left over boards which means that Lowe's had exactly what I needed to get the job done. If there were only 9 boxes and I bought them, I wouldn't have been able to finish the floor. Lucky find!
The total cost for the project adds up as the following: Hardwood, $340, underlay, $98, nails, $31, nail removal tool, $14, rental tools, $25 + $44= $69. The grand total, $552 +tax and gas, putting us right around $600 for a beautiful hardwood floor!

Lessons learned? With regard to nailing the floor down, always get the right tool for the job early, don't figure you can do a better job by hand or with the wrong tools, you'll regret it later. With regard to the hardwood expansion space, pay closer attention to the end spaces. Some of the end pieces are a little shorter than I'd have liked. With regards to the carpet transition, if you know the right way of doing a job, do it that way first, instead of taking a shortcut you find on the internet that looks bad and end up redoing the whole procedure the right way to begin with! With regards to the refrigerator floor damage, I don't know if I could have avoided the floor damage. We used paper and cardboard to protect the floor, but really, I'm so happy it fit that the damage is a small price to pay.
Brought to you by "The Amos School of Construction"
No comments:
Post a Comment